 The small picture on the left is the viewer box, this is a preview of what the final video would looks like. This is a useful tool because we can watch the footage as we are editing it, this helps us identify mistakes in our work and put these right. This box allows us to edit save time, without this box we would have to edit all our mistakes we have not identified at the end of the editing proccess.
This shows the video with all the added effects and tranisitons that have been added in final cut, we can see how the transitions fit the music if they do not then we can take them out during the editing proccess rather than noticing at the end.
The first thing to do on Final Cut was to add our audio track in so we could see how our visuals looked up against the music and also identify areas that the lip sync was off. Matt did this by opening the audio file and dragging it to the bottom of the panel. The audio track is in green and located at the bottom of Final Cut, this is what it looked like when the track was imported.

Another section on Final Cut is the browser section, which stores the uploaded footage in one place. This was useful in saving time, we did not have to search our computer every time we wanted to edit footage. One of Final Cuts key elements is Non Destructive editing. By using the mark in and mark out tools which do not delete our footage. This enabled us to re use footage had Final Cut not have had non destructive editing we would have had to take extra care in what clips to use and the process would have taken a long time. We also named the clips that have been uploaded, this contributes to the effciency of Final Cut. Going back to the mark in and out tools, we simply loaded up the footage and then when we started to edit we clicked mark in to start the cutting proccess and mark out when we had the clip we needed. We then dragged the clip into the timeline, the clip thats selected remains in the browser section and is not deleted.
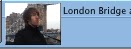
This is what the clip looks likes when it has been dragged onto the timeline, it shows a small shot of the first frame of the footage. It also shows the name and the length of the footage.
Once Matt had gone through all the footage and with close reference to our animatic selected the footage the timline began to become more populated with seperate clips. Below is what the timeline started to look like.

 When Matt was editing the footage he found that there were several black gaps that needed filling with footage. However because the timeline was showed the video in minutes these gaps were very small and could not be seen. Matt seeked advice from a class mate, what he then did by using the tool in the bottom left of the timeline was make the clips bigger. All he did was drag the dark grey arrow in between the two black arrows. This allowed him to make the clips bigger by being shown in millieseconds rather than seconds, which made to gaps easier to see, enabling Matt to fill the gaps.
No comments:
Post a Comment